1. Locate and mark positions of holes on the outer side of the wall 2. Drill a clearance hole through the outer wall and to the required depth 3. Blow out the hole and thoroughly flush with water. 4. Fix the Cem Flex nozzle to the Bond Flex gun kit 5. Mix Bond Flex and load into Bond Flex gun kit 6. Pump Bond Flex to the outlet of the nozzle. Insert the nozzle to the full depth of the drilled hole and pump Bond Flex to fill the hole. Keep light pressure on the gun to ensure that all voids are filled with Bond Flex 7. Wind the correct length Cem Flex into the hole using the Cem Flex insertion tool 8. Make good at the surface of all holes and leave ready for any decoration 9. If there is a lot of movement in the arch then the ties will have to be installed in phases. After each phase the ties should be left for 24 hours for the Bond Flex to achieve an initial set. After 24 hours continue with the next phase.
Guidelines
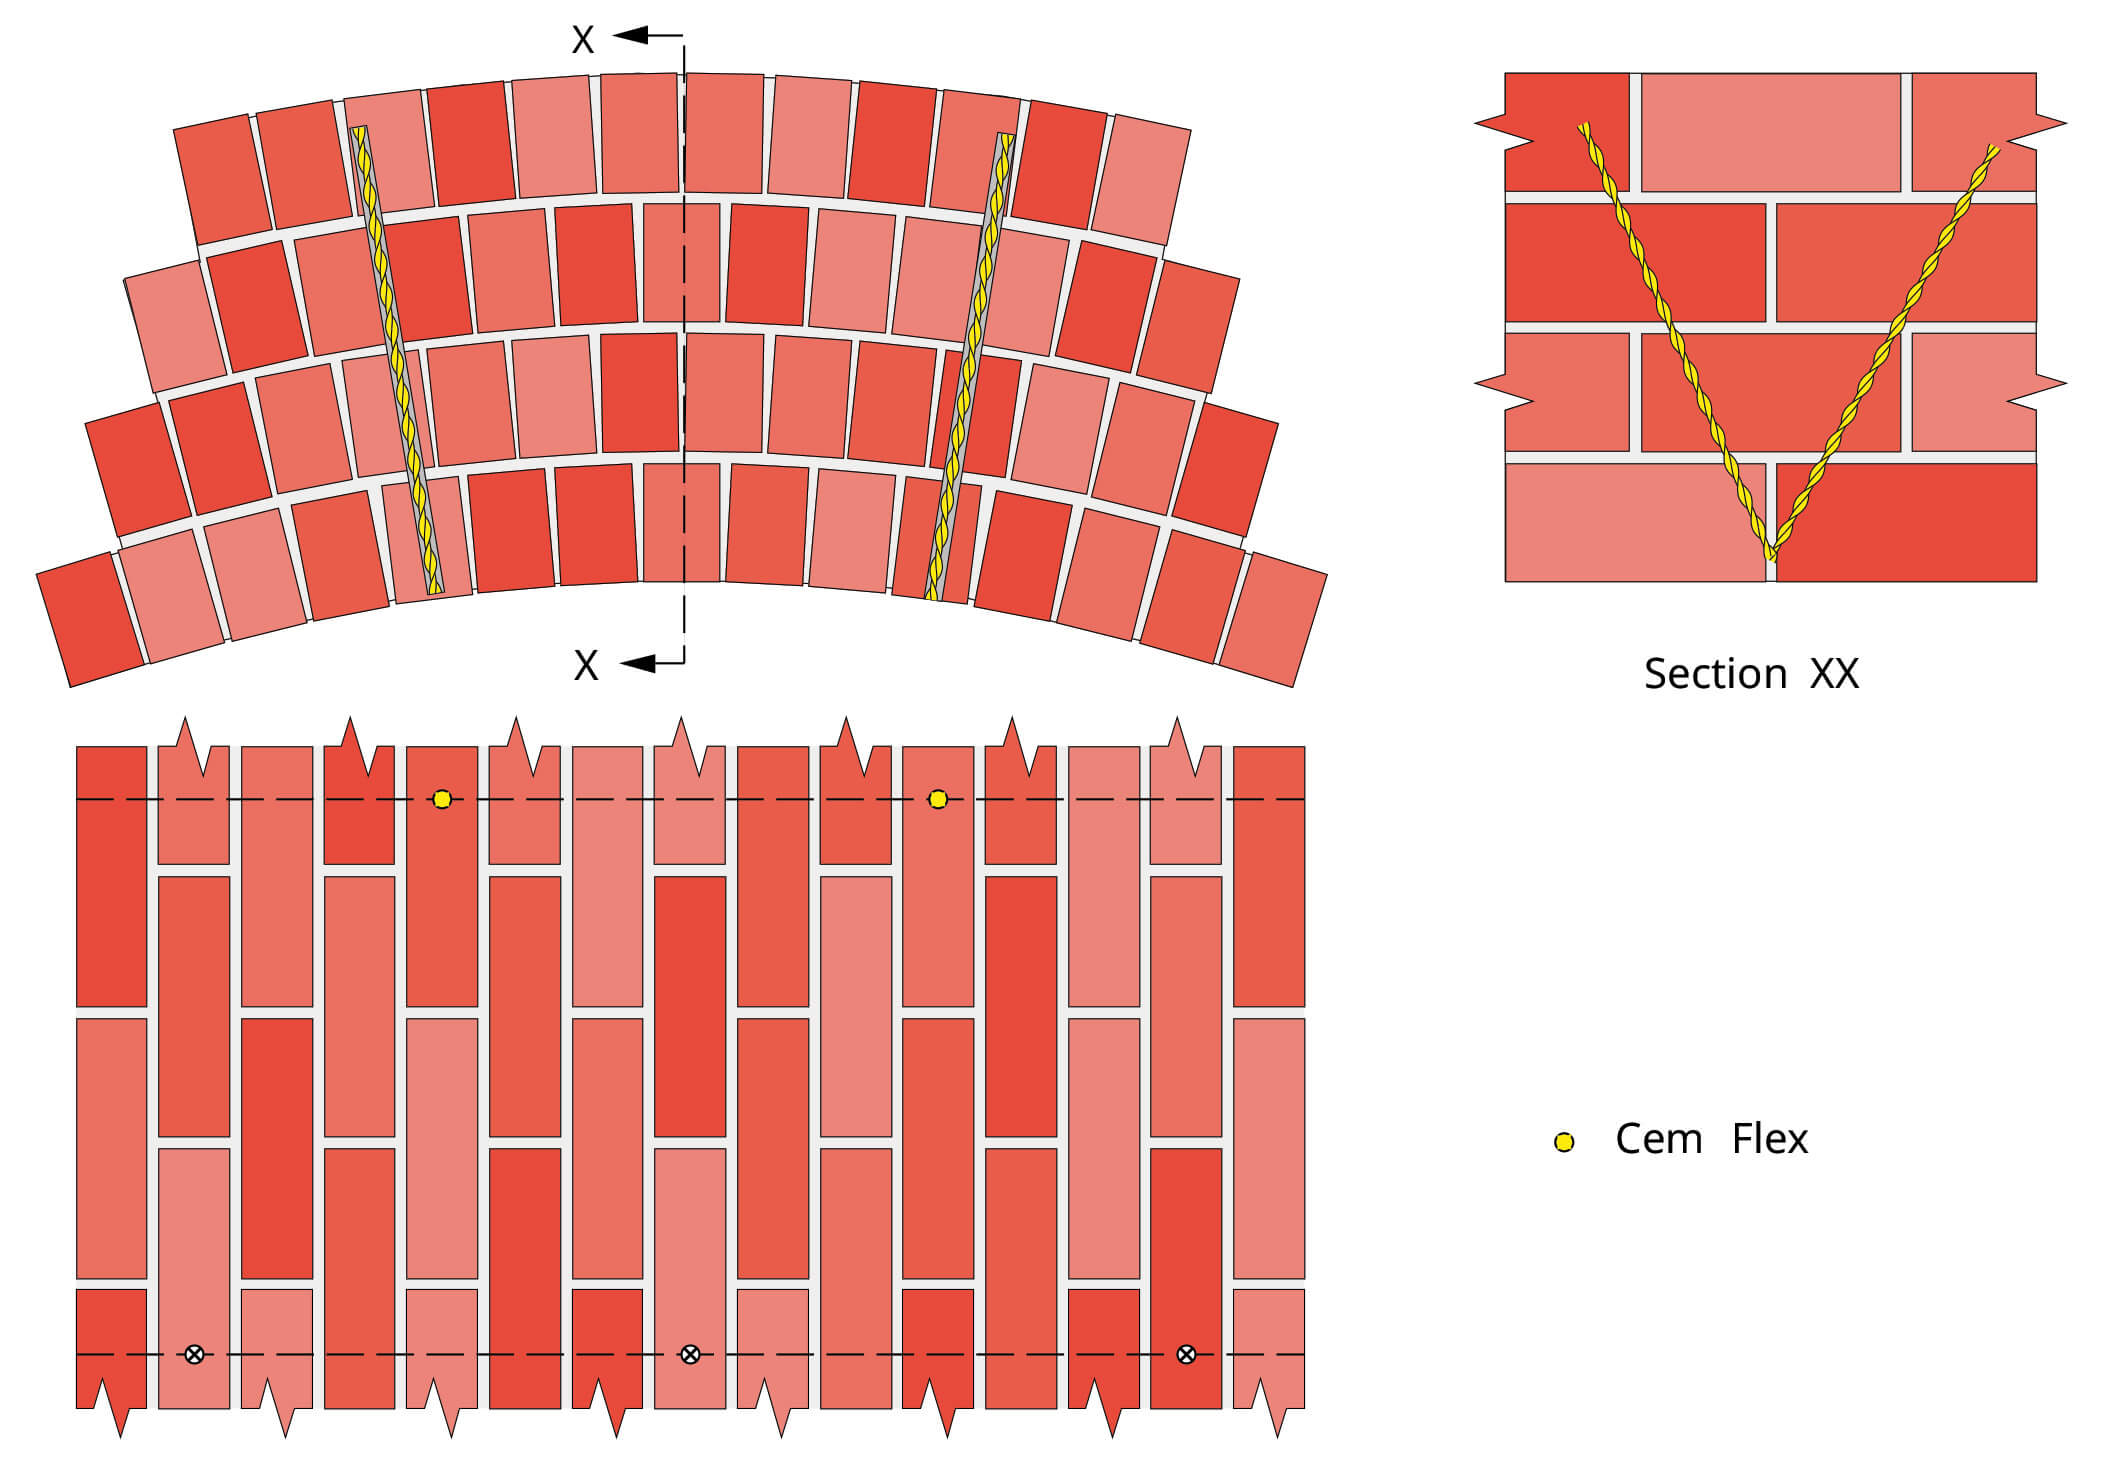
A. Clearance hole to be 13-16 mm diameter depending on the material to be used B. Nominal grid spacing of Cem Flex to be 450 mm. C. The holes to be angled at approximately 60° to the left or right of the marked lines. Alternate holes to go in opposite directions. D. Where arch rings are badly delaminated and/or brickwork is very loose the Cem Flex will have to be installed in phases. In this case consideration should be given to using extra ties to help to stabilise the brickwork prior to installing the first phase of Cem Flex. Depending upon the condition of the brickwork it may be possible to use Dri Flex for this purpose.
 Nederlands
  Polski